Article
Mar 11, 2025
SonarQube is a +1 tool for your belt
Gustavo Kleist
SonarQube is an open-source platform for continuous inspection of code quality to perform automatic reviews with static analysis of code to detect bugs.

Today we will approach a new topic around here, quality.
We have several tools and ways to detect, measure, and deliver quality when we talk about coding.
From lint to documentation, from unit tests to automatization, from git hooks to code review.
With so many options on the shelf let's pick up one a try something new.
This time I opted for the SonarQube, Since I never got a chance to do it from scratch the experience was worth it.
SonarQube is an open-source platform for continuous inspection of code quality to perform automatic reviews with static analysis of code to detect bugs and code smells in 29 programming languages.
This tool helps us to avoid some mistakes we can’t see, insight about possible bugs, vulnerabilities and security breaches, code smells, test coverage, and duplicity percentage.
Even if you don’t see the need for such a powerful tool or don’t have the budget to run it on the cloud for the entire company, you can simply run it on your machine in a super simple way.
The following tutorial will present how to raise a SonarQube instance and connect to a Nuxt3 simple project fully locally.
The first step, raise our SonarQube instance.
Docker Desktop for MAC M1
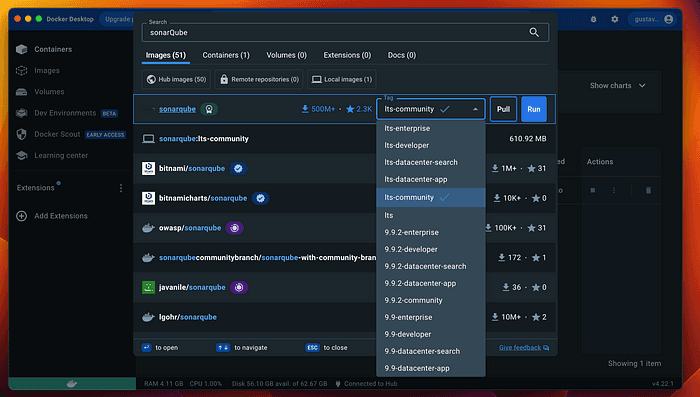
Selecting the “its-community” option will provide us with a community image that doesn't require a license key or payment.
After pulling the image from the Docker Hub, and after the download select the 9000 port if asked, and that’s it we have our SonarQube instance running.
SonarQube Running
Now let's update our admin credential, by default, it’s admin/admin, redefine it on first access.
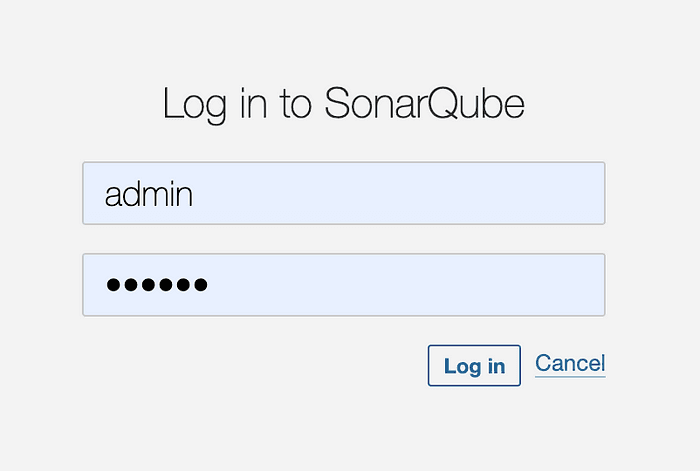
SonarQube Login
Next step, create a project, and set up the project name and key alongside the branch sonar will watch.
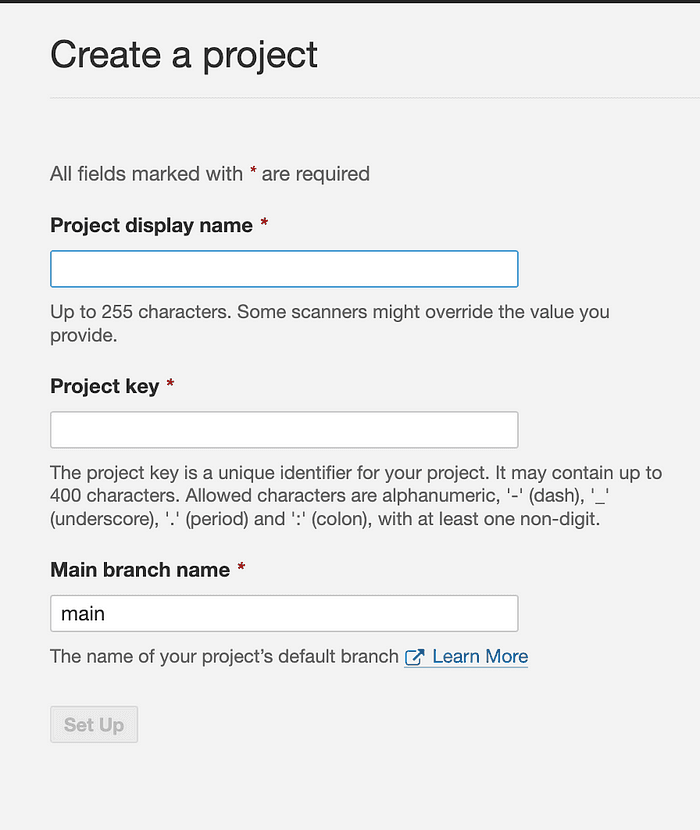
Project Creation
In the following step, we will choose “Locally”, In this tutorial we will be approaching this kind of connection.
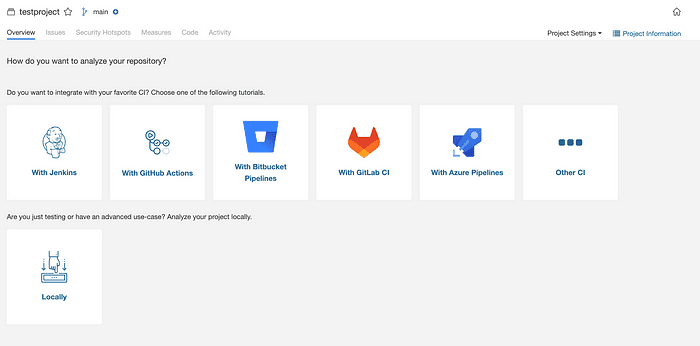
CI Options
Create a project token and set up the expiration date of it.
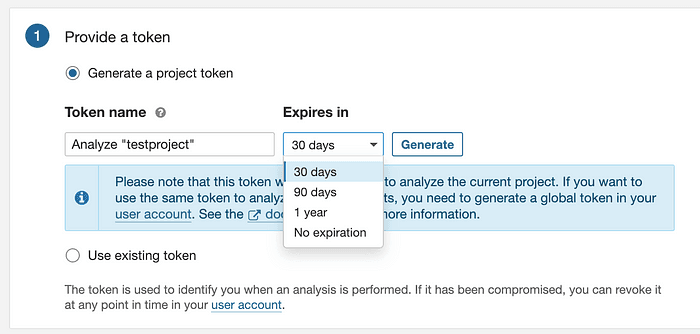
Token Generation
After selecting the type of project we are working on we are good to go.
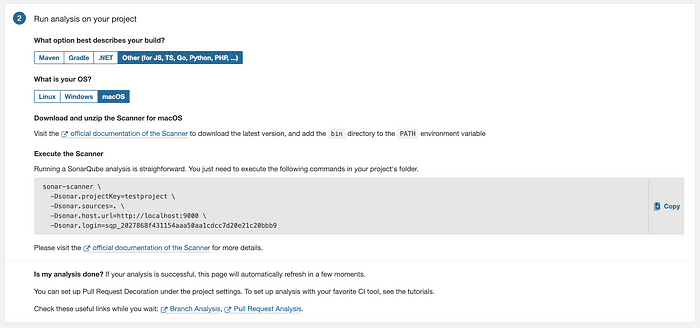
Project Type
Now we need an npm package to run the sonar-qube analysis easily, this step can also be done by zip file link down below.
After installation, we can run this command to see it running.
sonar-scanner -h
If everything is fine by now, you will see something like this.
Starting analysis...
Executable parameters built:
{
 httpOptions: {},
 targetOS: 'macosx',
 installFolder: '/Users/user/.sonar/native-sonar-scanner',
 platformExecutable: '/Users/user/.sonar/native-sonar-scanner/sonar-scanner-5.0.1.3006-macosx/bin/sonar-scanner',
 fileName: 'sonar-scanner-cli-5.0.1.3006-macosx.zip',
 downloadUrl: 'https://binaries.sonarsource.com/Distribution/sonar-scanner-cli/sonar-scanner-cli-5.0.1.3006-macosx.zip'
}
Trying to find a local install of the SonarScanner: /Users/user/.sonar/native-sonar-scanner/sonar-scanner-5.0.1.3006-macosx/bin/sonar-scanner
Local install of Sonarscanner found.
INFO:
INFO: usage: sonar-scanner [options]
INFO:
INFO: Options:
INFO:  -D,--define <arg>     Define property
INFO:  -h,--help             Display help information
INFO:  -v,--version          Display version information
INFO:  -X,--debug            Produce execution debug output
Analysis finished.
We are almost good to go, This step is for Nuxt3 testing information since SonarQube won't be running into the pipeline it doesn't have access to the coverage, so you will have to send it to by command line.
For my test project, I’m using Vite to make the tests so here is the configuration for generating the “lcov.info”
Sample of “vitest.config.ts”.
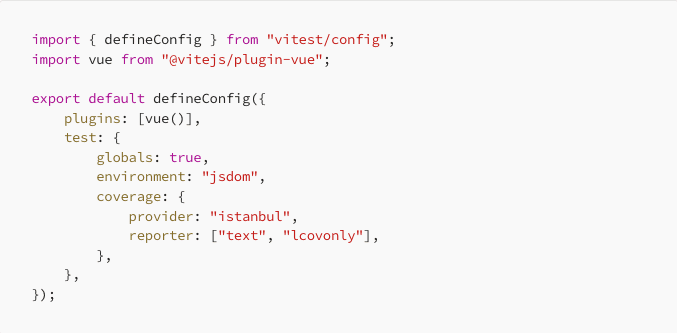
with this configuration, we can generate our coverage report using the command.
vitest --coverage
After all this configuration it's time to finally send the information to our sonar.
sonar-scanner -Dsonar.projectKey=Solarive -Dsonar.sources=. -Dsonar.host.url=http://localhost:9000 -Dsonar.login=sqp_cb23f476ffa5d3f8ba8a0812779d1665f48a1994 -Dsonar.javascript.lcov.reportPaths=./coverage/lcov.info
this command will be placed in the scripts area on our package.json, or just runner on the terminal.
Is the same command generated by the SonarQube with the addition of the “lcov.info”
And there you have it.

SonarQube dashboard
Now we are free to fix all insights that SonarQube provides us.
SonarQube is a powerful tool with helps us improve our code, and detect some faults we committed on the way, and with this small explanation on how to configure It, there is no excuse to not use it.
In the future, I will create a small article with more tips on how to configure a real pipeline and how to customize it a little bit our SonarQube metrics.
Links:
https://docs.sonarsource.com/sonarqube/latest/try-out-sonarqube/